Managing tabs is difficult. I used to use a separate Desktop (Space) for entertainment and different courses. Each of these desktops had a Firefox window with their own tabs. While this worked, it was difficult to manage so many desktops. Additionally, keeping so many windows and tabs open really slowed down my computer.
Simple Tab Groups (STG for short) can help solve this problem.
Usage
First, download the Simple Tab Groups Extension.
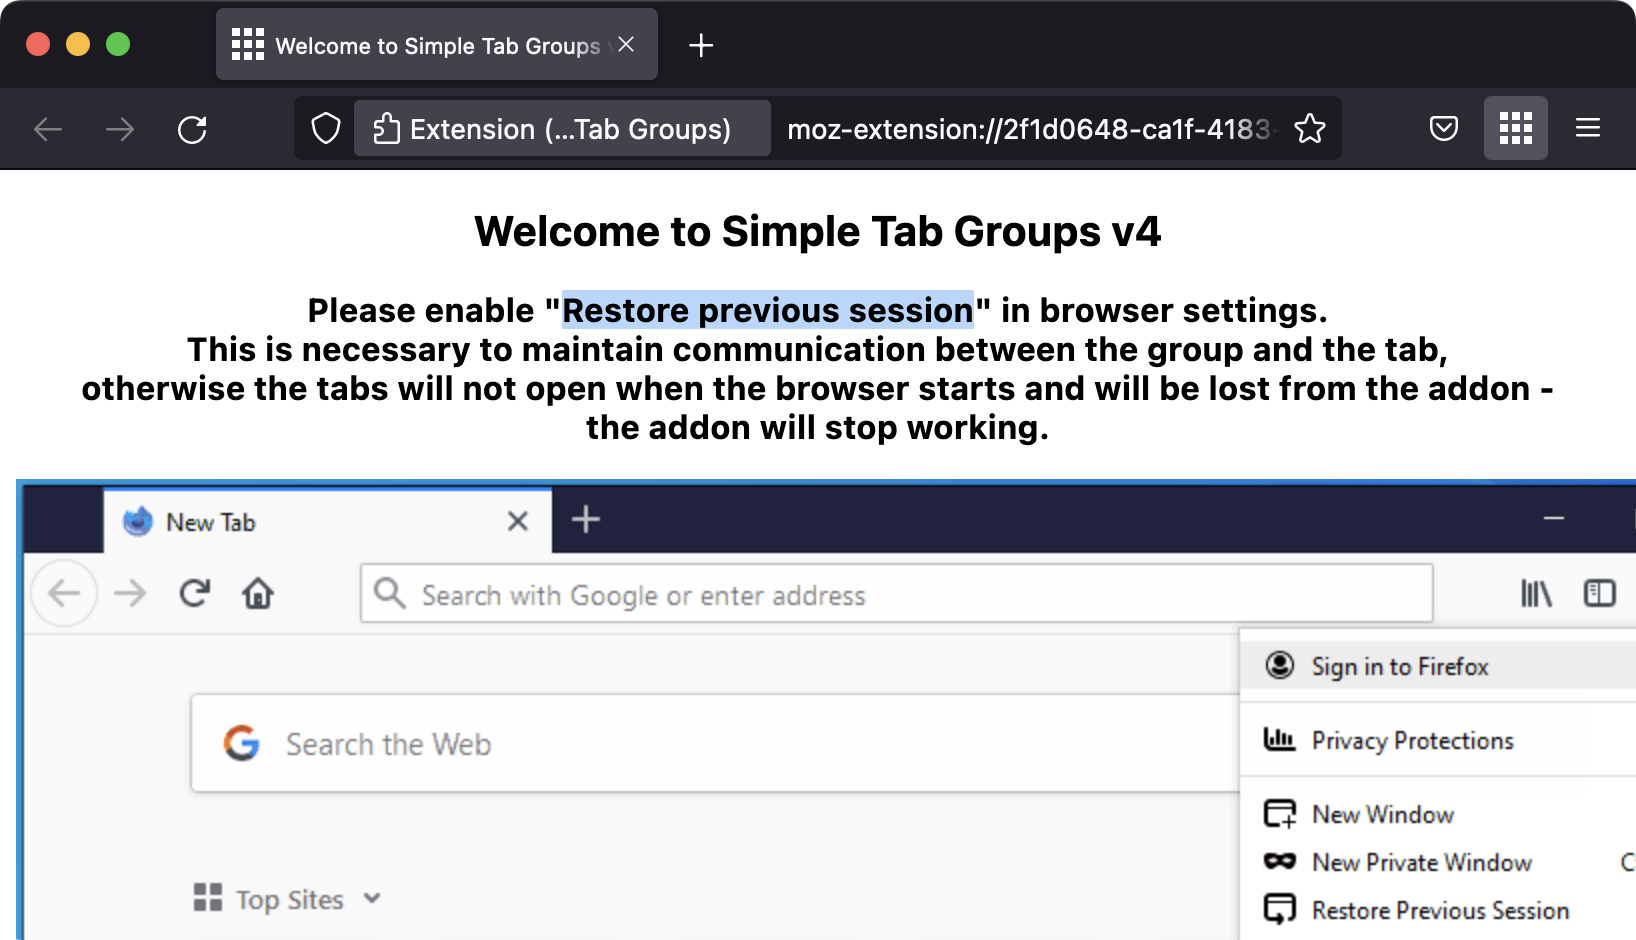
After installing, go to the settings page (about:preferences) and select "Open previous windows and tabs". Note that this setting has changed from "Restore previous session" to "Open previous windows and tabs".
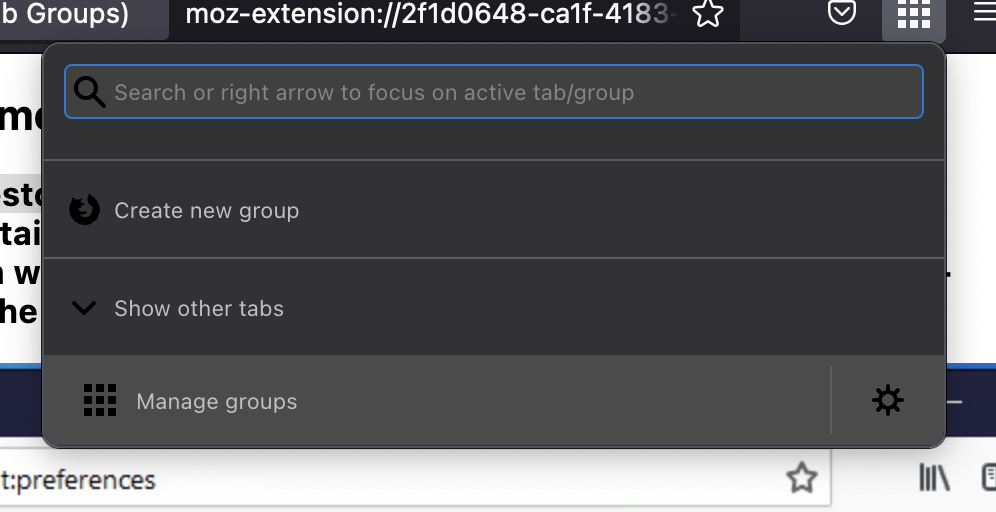
Your browser should look like this with the STG button on the top right.
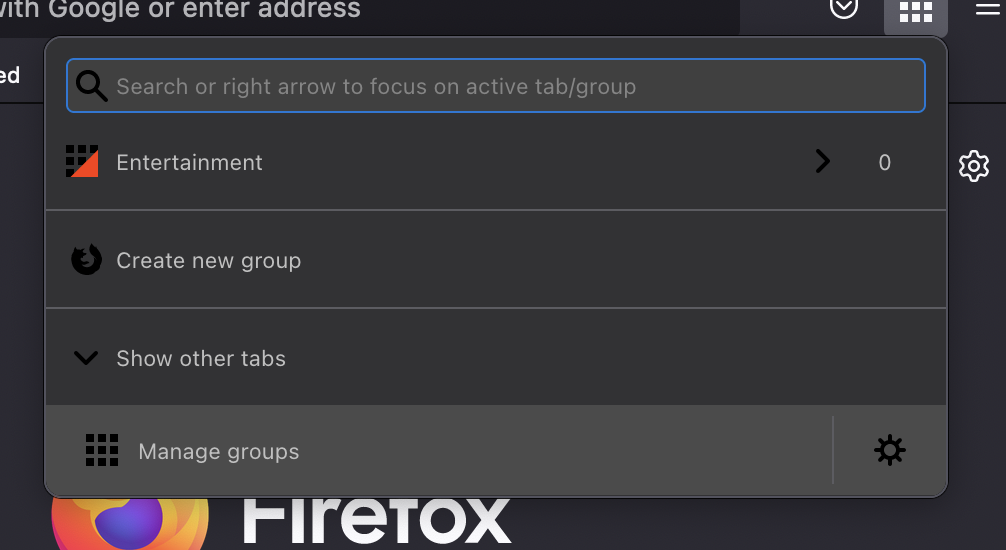
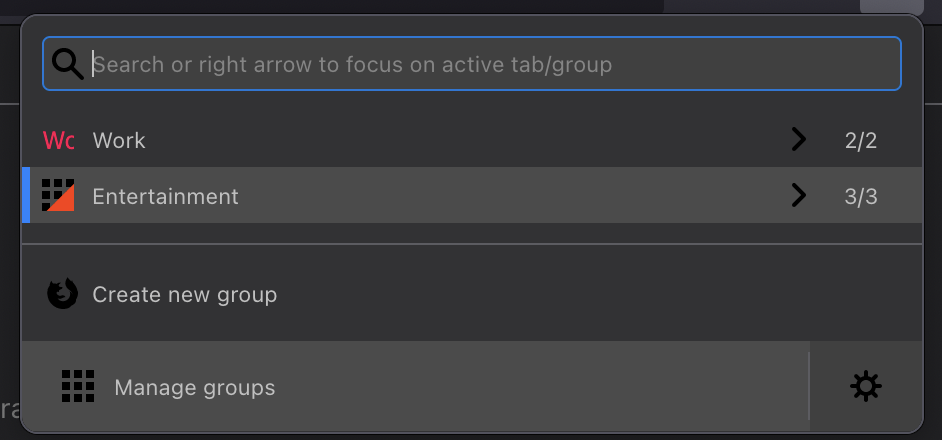
Click the STG button on the top right and you should see the menu. There should be three options:
- Create new group
- Show other tabs
- Manage groups
By default, there will be no tab groups. If you have any other tabs open, they will be available under "Other tabs". For example:
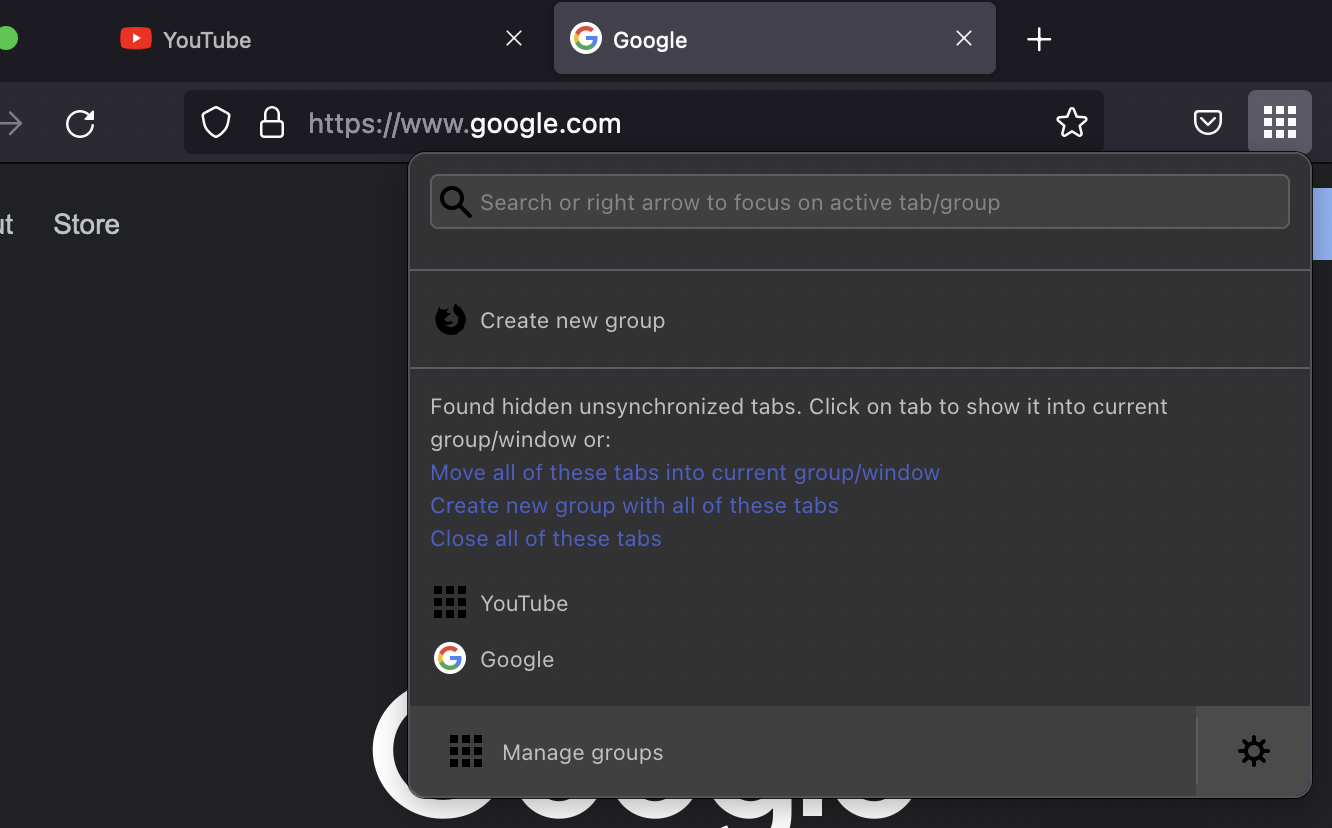
The YouTube and Google tabs are not a part of any tab group, so they are under "Other tabs".
Groups
To create a group, click on the "Create new group" button and give the group a name.
I am going to make a group for "Entertainment", which will contain websites such as YouTube and Netflix. Clicking on the STG button will now show that there is one tab group:
Note the "0" on the right of the Entertainment tab group. This means that there are no tabs in this group right now. The group has also been given a default icon, which can be seen on the left side of "Entertainment".
To switch to this tab group, click on "Entertainment". This should clear the tabs in the window and show this notification:
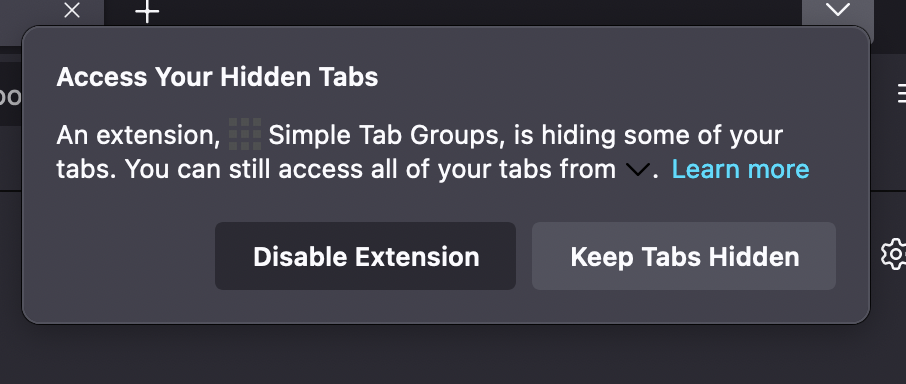
Click on "Keep Tabs Hidden".
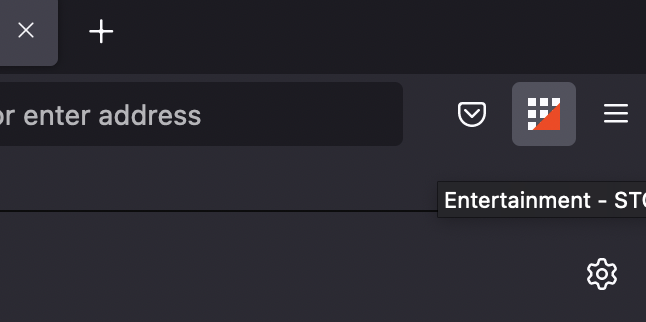
We are now in the Entertainment group. You can confirm this in two ways.
The STG extension icon has now changed to the Entertainment tab group icon:
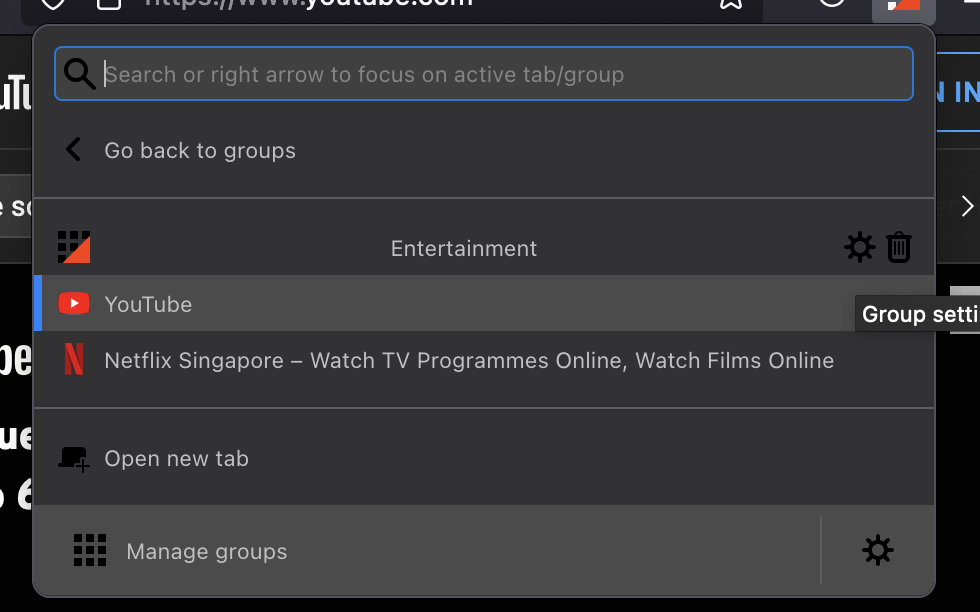
Clicking on this icon will show the Entertainment button highlighted.
Open YouTube, Netflix, or any other tabs.
Creating more groups
Similar to the Entertainment, let's create a group for Work, and open sites like Google Docs, and Mail:

Now try switching to the Entertainment tab group. You will see that YouTube and Netflix are open, while Mail and Google Docs are gone.
Click on the STG icon again and click on Work. Now YouTube and Netflix are gone, but Mail and Google Docs are open.
I personally find this very powerful as it is easy to work on multiple things without closing tabs. I use one tab group per course at university. When I am done studying the content of one course, I never close all tabs, I just switch to the tab group of another course. This lets me get back to exactly where I left off without having to create bookmarks.
Changing Icons
To change the icon of the Entertainment group, click on the STG icon, then click on the "right" button.
Open settings by clicking on the settings/cog button.
You can now set the icon.
Settings to change
Tab discarding
To open the settings for the extension, click on the STG icon then click on the "cog/settings" on the bottom right:
I personally recommend enabling the setting "Discard tabs after hide (this will save RAM)". When you switch from one group to another, the tabs of the inactive group will be "disabled" (not closed). When you switch back to that group, the disabled tabs will be re-enabled. This saves memory by putting tabs to sleep when they're not in use.
Tab overview home page
To see a page with an overview of all tabs, click on the STG button button, then click on the "Manage Groups" button at the bottom.
This should open a page that looks like this:
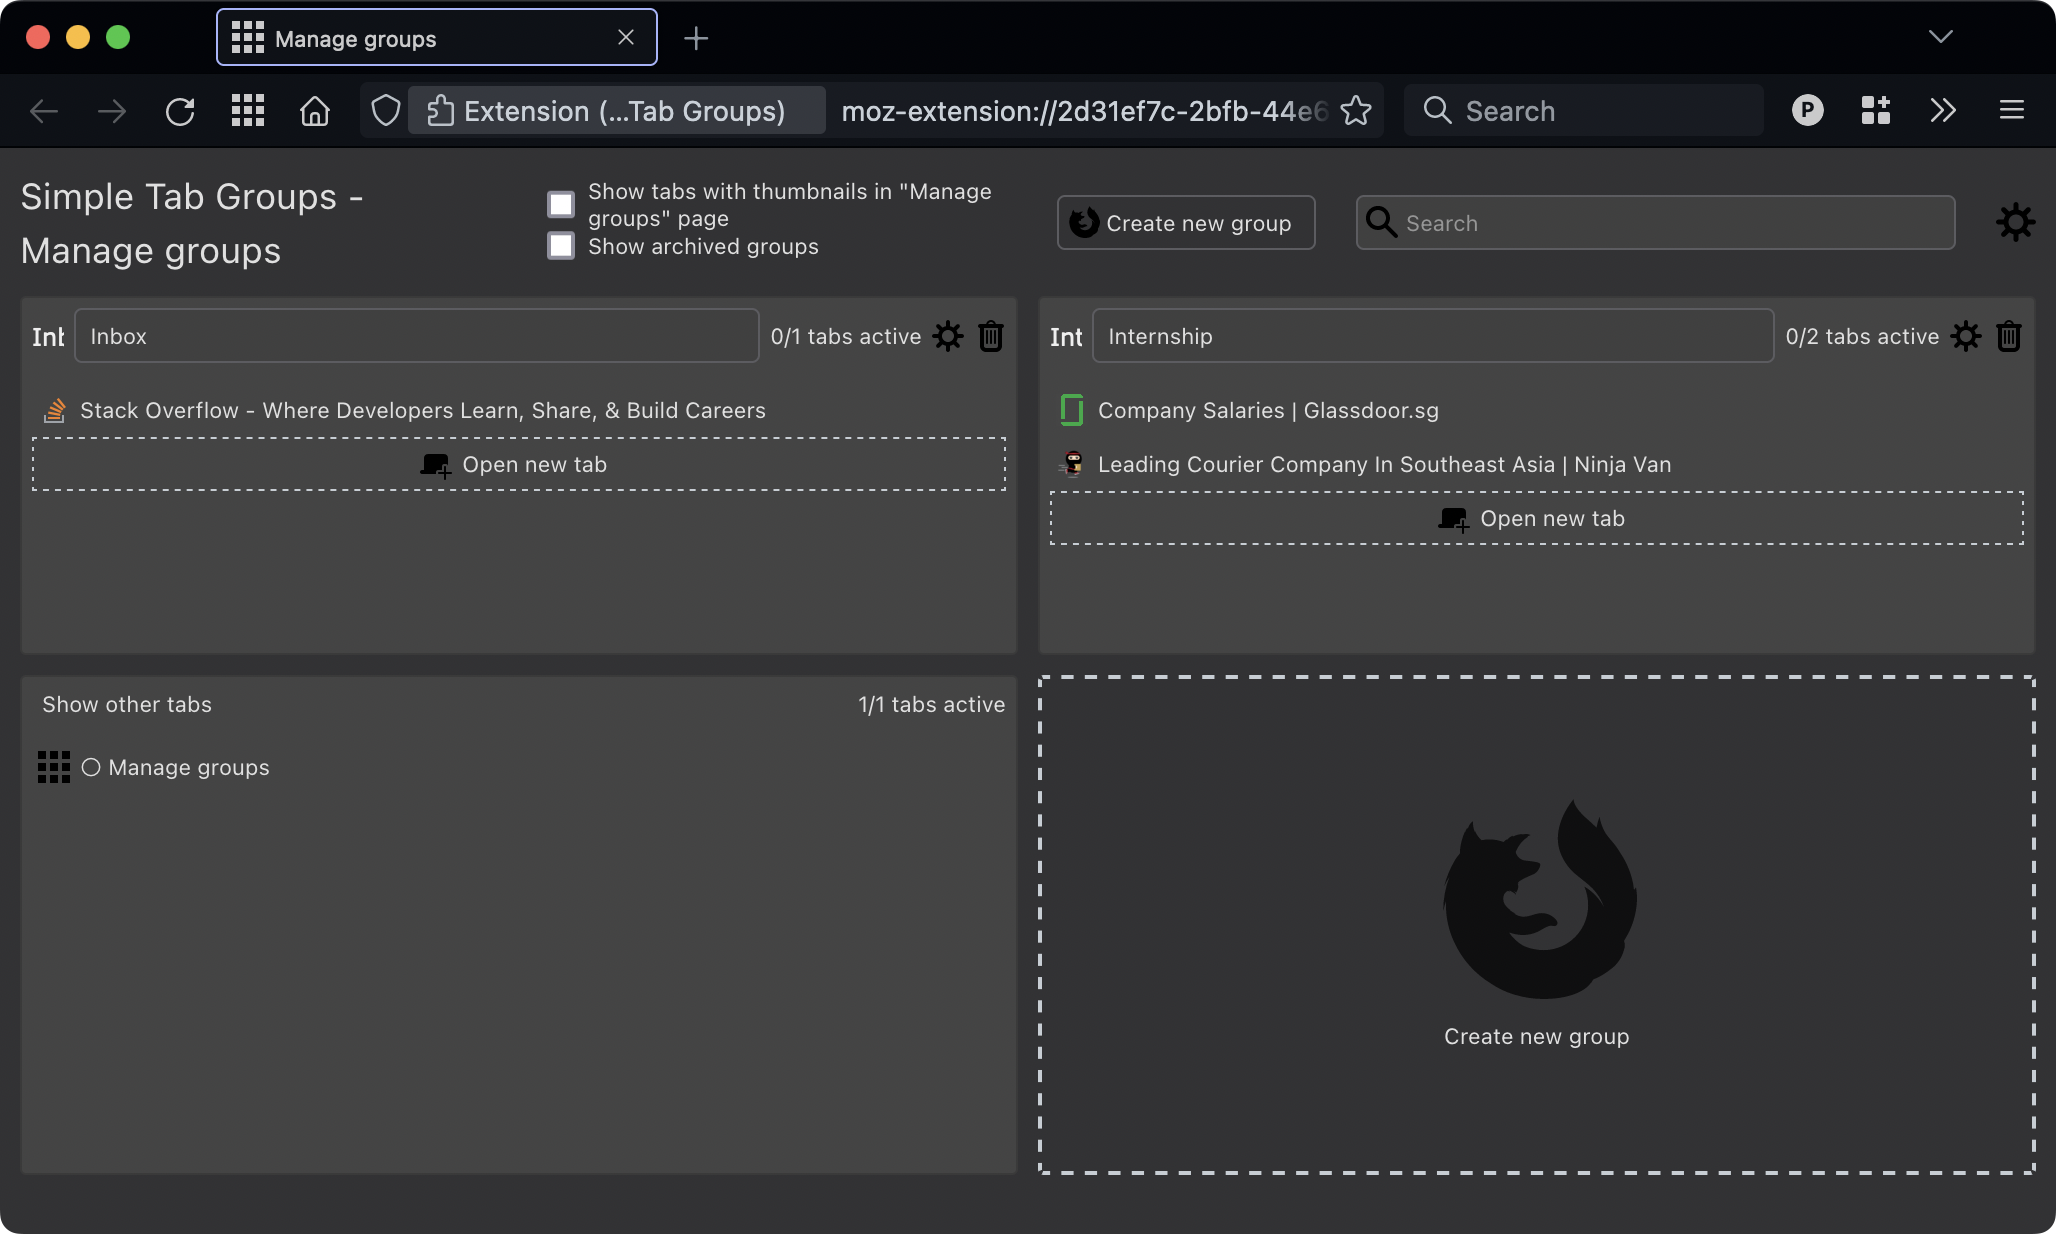
This page is useful for viewing all your tabs at a glance, so I like to set it as the "new tab page" so that I can see it whenever I open a new Firefox window.
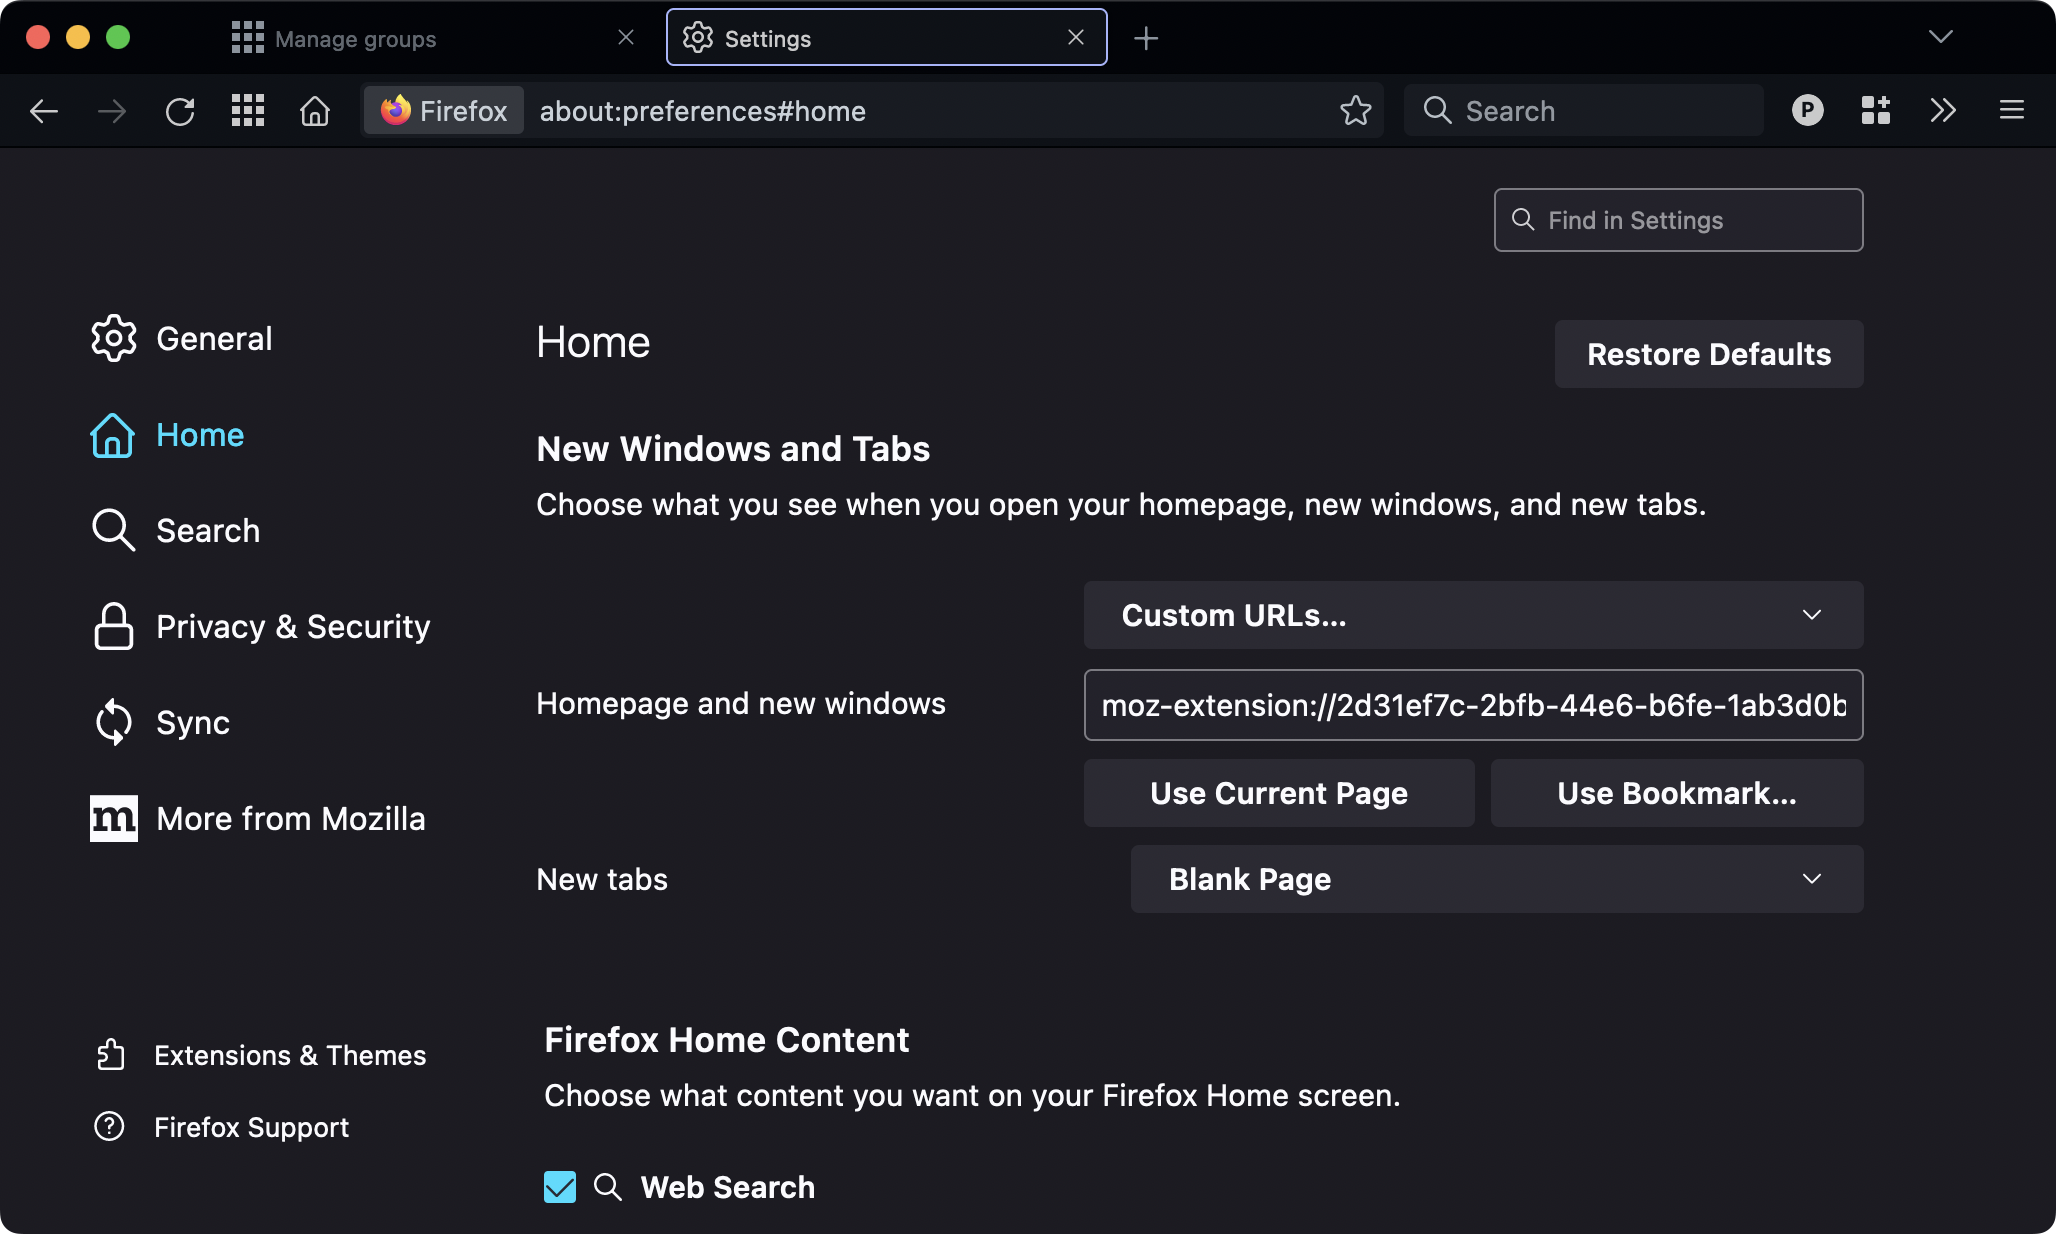
Copy the URL of the page. It will be something like moz-extension://xxx-xxxxx-xxxxxx/manage/manage.html.
Then open Firefox Settings > Home > New Window and tabs. Set "Homepage and new windows" to "Custom URLs...", and paste in the URL copied.
When complete, your settings should look something like this: